Friday, August 16, 2019

My Arcade Art Repro webshop is online

Hi there! Since a couple of years I focus on making Arcade Art Reproductions.
Side art, control panel overlays, marquees, bezels, plexiglass pieces you name it.
Custom orders are also accepted and shipping from the Netherlands. So might be interesting for some of you. Thanks!


Thursday, November 8, 2018

10 years on! Donkey Kong Fighter control panels!

Hi there! First of all, thanks for all your support and kind messages I've got over the past 10 years! Never would have thought that a personal blog of building my first arcade cabinet - which started this hobby - would still be a relevant and informative source for a lot of you.

Speaking of you guys, most of the mails I get are about the 2-player 6-buttons control panel layout I designed way back when I started this cabinet build. Which I never finished, I decided to go for a regular Donkey Kong panel instead.

But since some of you are interest in these control panels, I am in the process of building a few complete "DK Fighter control panels".

These panels will have newly designed artwork themes for DK and DK JR., based on the old famous 2-player design. Which will be professionally printed printed in-house, mounted in reverse on laser cut acrylic (same size and specs as original Nintendo acrylic).

To sum it up, these panels consist of:

- 2 Joysticks (4/8 way)
- 6 Buttons per player (Happ buttons)
- Nintendo white T-molding
- Wooden panel (thickness of 15mm, MDF or Plywood)
- Black paint finish
- Control panel latches on underside
- Laser cut acrylic (thickness 3mm)
- 8 control panel carriage bolts
- Wiring optional

Here are some teaser photo's to give you some insight of things to come.
I expect the first batch to be ready in december 2018.

Artwork not final but close. Button colors have yet to be determined, joystick balltops will probably be black like original Nintendo joysticks. But please let me know what you think about it or want to see!
In the meantime, feel free to check out my Instagram or Facebook.
I post a lot of my arcade artwork reproductions on there.

Thanks for your years long support!


Friday, March 15, 2013

Game over


Well, the cabinet is somewhat finished, really :)

This week I've been busy with the inside of the cabinet, hooking up a nice 60-in-1 multigame board with some great vertical arcade classics.
Since the screen I used is a stripped scart television, it was an easy choice to use a supergun setup inside the cabinet. That way I can plug Jamma pcb's in it (or an original Donkey Kong board with a Nintendo-to-Jamma converter board). I chose to get a cheap multigame board instead for this project, and use the DK board as a spare for my "real" Nintendo Donkey Kong machine which I'll pickup in about two weeks.

Superguns work plug and play with standard computer ATX PSU's (power supplies). But those large bricks have a lot of additional wiring looms I don't need. So after playing with an ATX for a while I decided to use a cheap switching power supply I bought on eBay some time ago. Made a custom wiring loom for it like FrancoB did here on www.arcadeotaku.com. It's superclean this way. No wiring clutter and no problem of how-to mount an ATX PSU to the wooden floor of the cabinet :)

On the picture you can see the supergun (MKIII by Vogatek) on the left.
It has the scartlead attached which goes into the tv, the white 20-pin ATX connector coming from the switching power supply, control panel wiring and a mini-jack connected which goes to the speaker behind the grill. On the right you see the 60-in-1 arcade pcb.

To switch the TV automatically in AV-mode without having to use the remote, I attached a 12v wire coming from the PSU to pin 8 of the scart connector (TV-side). That's the red wire which is hanging along the scart cable. I followed Level42's (Andre's) guide as published on www.arcadecontrols.com


Above, the switching power supply with mains going in on the right side (2 x AC and FG=ground). And on the left the output (12v, 5v, -5v and ground).

Below, a view of the wiring. Sorry, have to rotate these two pics really.
But you can see power going in the cabinet on the left, going to a multi socket with three cords plugged into it. One for the PSU, the light fixture and the TV.


Just a shot from the control panel area as seen through the backdoor, under the monitor.

Here are some glamour shots of the finished cabinet. Or the cabinet so far, since I still have a couple a small things I want to do.

- Maybe cut the power cords on the inside to the right length, so even less clutter.
- Touch-up the black paint on the front. I was a little messy with the blue on the edges.
- Cover the "air-vent" on the back door.
- Do something about the missing coin mechs, return buttons, bucket etc. I have just the plates installed right now.


Oops, a little black touching up needed on the back as well :)


The speaker with grill installed. Only a bit sad that the grill doesn't cover the entire slots as you can see on the outer edges. But it's not too bad.


Coin door with missing parts. I have them lying around but just need to install the parts.


Thanks for reading! I you have any questions, just place a comment here or e-mail me!

Speaking of questions, quite a lot of you are asking me about the 2-player control panel overlay I designed (and didn't use myself) a couple of years ago, sadly I only have it in Coreldraw files (.cdr) and use Adobe these days so I can't convert the files myself. But I can send you the files I have for free if you do want them, no problem.


Thursday, February 28, 2013

Update february 2013! :)

Hi there and thanks for still checking back here!
Over the last couple of weeks I have been dragging my arcade cabinets out of storage (thanks neighbours!) and into the brand new (heated) garage with gameroom.
As you can see in the corner, the Donkey Kong kabinet is somewhat finished, albeit it empty inside at the moment.
Still plan on putting in the DK boardset I have lying around. But need to build a proper wiringharness for that.


My girls checking out Puzzle Bobble on Neo Geo MVS and the DK in the corner

Joni helping me "clean" the row of Sega's

Nice and shiny Sega New Astro City, Astro City and Blast City.

Enough space for (near) future expansion :)

AND NOW SOMETHING REALLY EXCITING!
In about two weeks from now I will go on a roadtrip from the Netherlands to Germany to pickup three (!) arcade classics.
Maybe one of them is easy to guess. But I just had to get it's brothers too :) As I am writing they are together with 50 other cabinets on the way to Germany.

53 coinop's on the way from Coinopwarehouse in Maryland, USA

A little spoiler of what's to come :)
Googled this image. They're not my cabinets, but you get the idea.

Tuesday, August 10, 2010

Face plate oxidation experiment :)

Instead of spraypainting the face plates right away, I decided to try something else first.
I have read sometimes that when you leave aluminium outside, exposed to oxygen and rain, it oxidates. When that happens it should get it's grey matt color back which is actually a protective layer which seals and hardens the aluminium. Which is exactly what I am looking for.

So i gave it a shot, sanded the face plates untill all scratches were gone. Wet sanded after that to polish it. And now it is as smooth as it can be and outside exposed to the weather. Just have to wait and see what it does.


Face plates sanded and polished to a buff. Waiting to oxidate!


This is what they looked like after removing the ugly thick paint with paint remover. A lot better than before, but scratched up pretty bad.


This is how I got them. Poor coin selector :( And poor me for need to restore it.


Thursday, August 5, 2010

Donkey Kong board!

Bit the bullet, ordered a board (2-board version) and some other nessecities!
Amongst them
- a Nintendo-to-JAMMA adapter
- a high-score save kit
- Two coin reject covers
- New bolts for coin door and coin mechs

Tuesday, August 3, 2010

New coin door opening and small updates

Oke, here we are.
- New cut made for the Nintendo coin door and repainted the area.
- MAME setup and controls are working great.
- Cleaned coin mechs but need some more work.
- Coin door straightend and resprayed, but needs more work.

Talking about MAME, I have been thinking about abandoning the computer setup with MAME and go for an original Donkey Kong board instead. Even though I have MAME set up real nice and clean now and every pixel is where it should be, the idea of putting a real board in there with a rich history makes me more happy everytime I think about it :) So i need to buy me a DK board, a Nintendo>JAMMA adapter (Mikesarcade's adapter houses a color inverter and audio amp which I will both need) and a cheap little supergun or build something myself for connecting it to the scart TV and controls. This thing is coming together nicely!


Really amazed by how good the "first" coat of blue looks! Tomorrow another and probably final layer.


Sanded and cleaned. Just before I put the first coat of blue on.
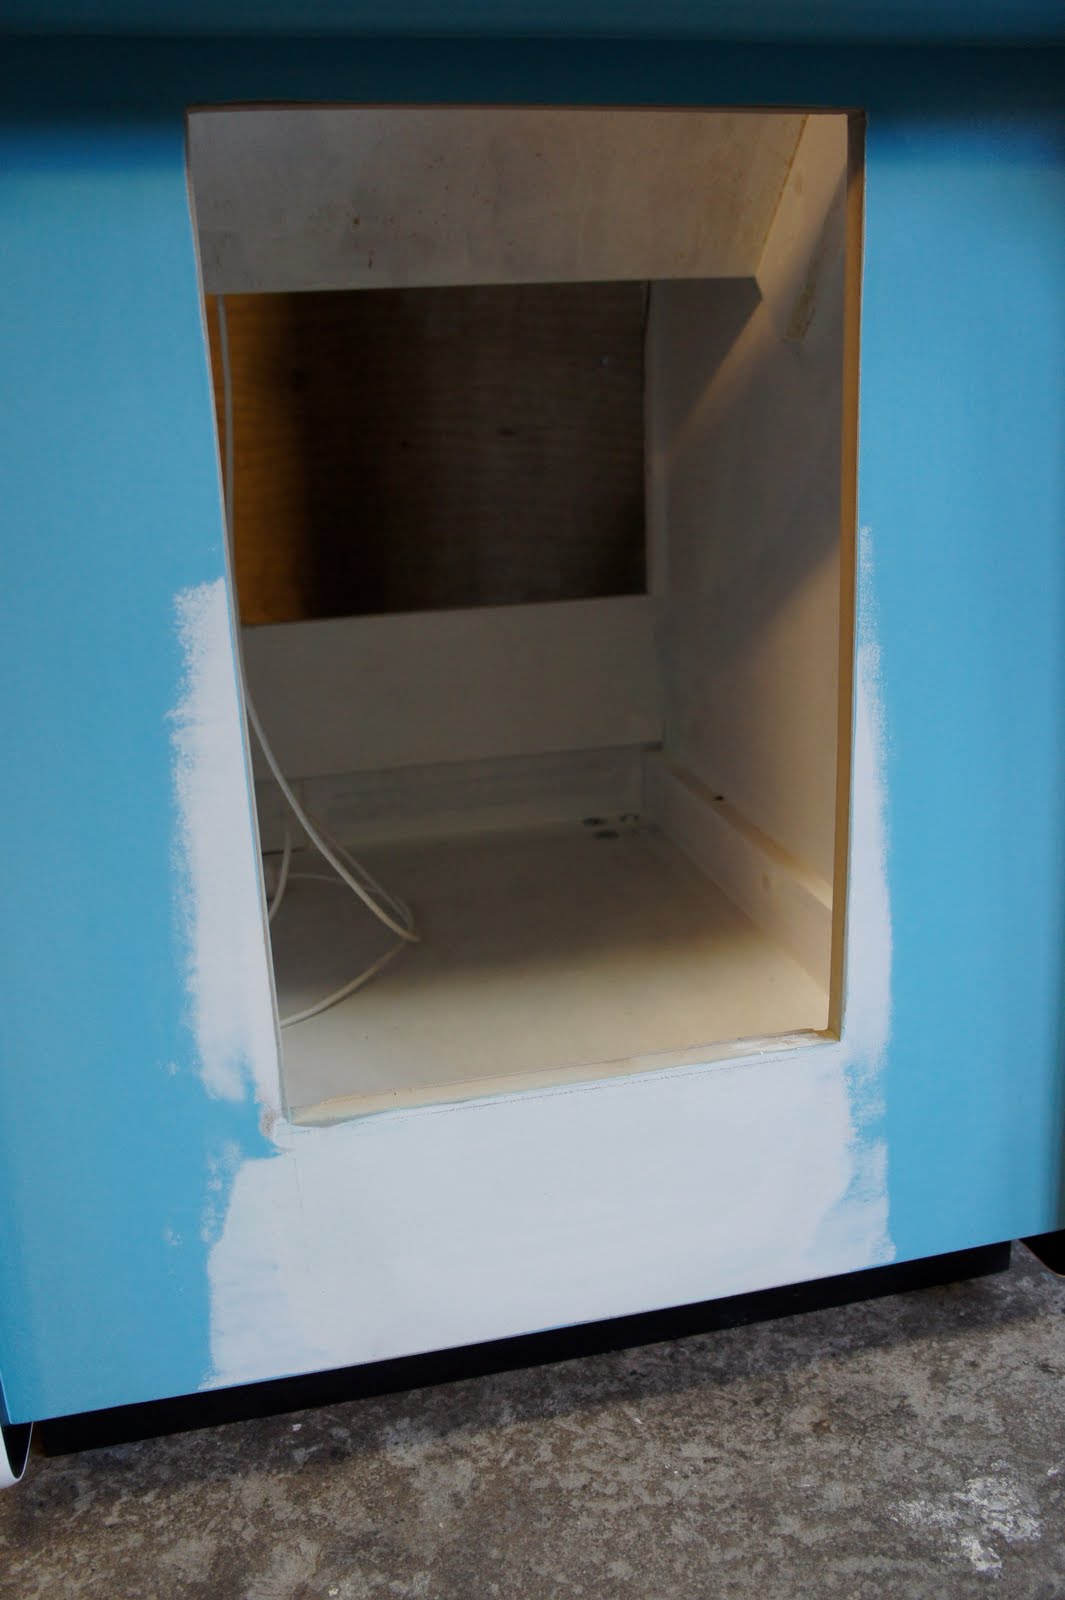
To get it perfectly smooth, two coats of primer and three layers of bondo were applied in total.


Fit's nicely!

New coin door cut-out drawn on the cabinet. Ready for the jigsaw! As you can see here, just a little more bondo is needed to make it perfect.


New coat of primer and some more sanding.


Sanded and primed.


Piece glued in and applied first layer of bondo.


Cut out a piece of MDF big enough to fit in the old coin door hole. New original DK coin door is wider, but shorter. So had to redo the cut-out.


Straightend and resprayed coin door in front of the cabinet before cutting the new door opening.
Door is going to be redone. Too many bumps and dents for my liking. A lot of bondoing and sanding the coming days :)


Face plates cleaned up really well! Although as expected, they're scratched up pretty bad. What to do now... My options:
- Sand and respray with aluminium-look spraypaint,
- Sand and anodize the aluminium back to original look.
- Let it be like this. Scratched up, but it shows it's history :)


Coin mech face plates. Tried paint remover on them because I would like to see how the faceplates looked like underneath the thick ugly paint. If I'd sanded it right away I would have a lot of scratches from sanding on them before even deciding wether to paint them or just clean them.


Coin mech faceplate before cleaning. Missing the coin reject thing, that's a pitty :( Luckily Mikesarcade has them.


Philips scart TV mounted on a square piece of MDF, exactly the width of the cabinet. So it is easily rotatable!


Pixel perfect Donkey Kong image, thanks to a scart TV, Ultimarc's Arcade VGA and MAME. Hooked up with home-made VGA>scart cable. Image looks exactly the same as an original DK board would look like on an arcade monitor.


Proud owner of an original DK joystick :) Been in the hands of so many gamers before me. Perhaps some good or well known players. Disassembled completely, cleaned very well with q-tips and WD40. Applied new grease. Ready for another 25 years of gaming! :)


Underside of control panel. Everything hooked up and working now. Only need swapping of the Sanwa JLF joystick with an original Nintendo joystick.