Thursday, August 5, 2010

Donkey Kong board!

Bit the bullet, ordered a board (2-board version) and some other nessecities!
Amongst them
- a Nintendo-to-JAMMA adapter
- a high-score save kit
- Two coin reject covers
- New bolts for coin door and coin mechs

Tuesday, August 3, 2010

New coin door opening and small updates

Oke, here we are.
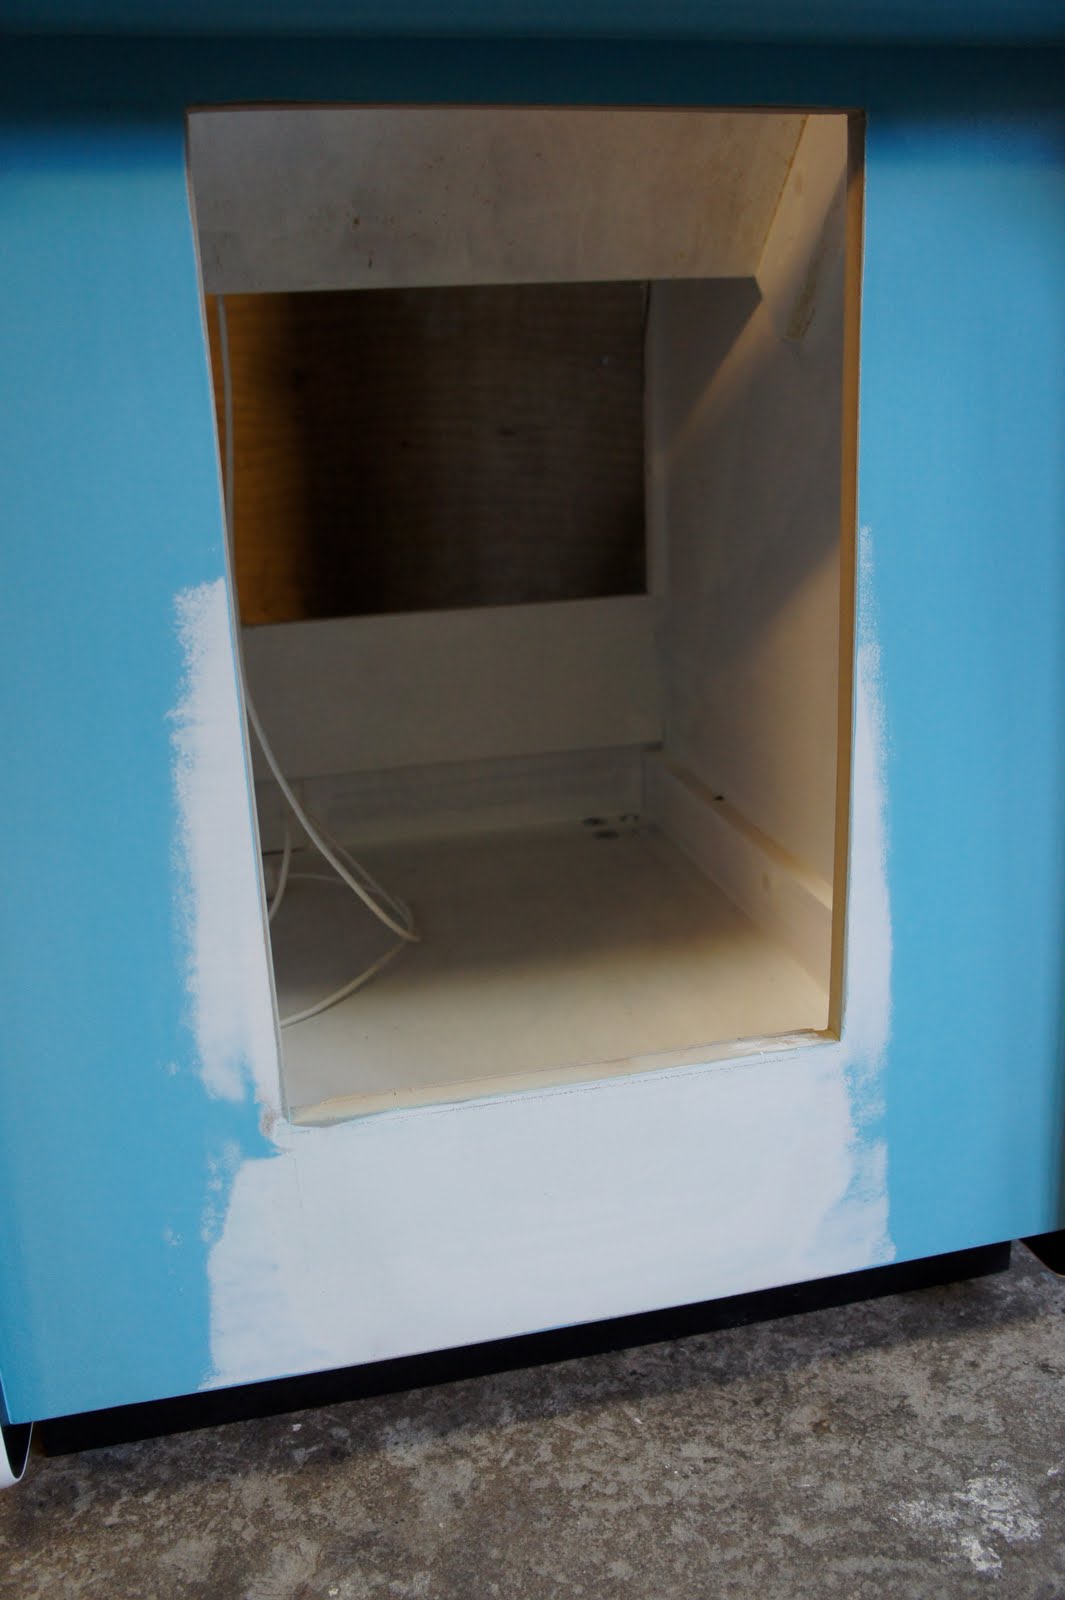
- New cut made for the Nintendo coin door and repainted the area.
- MAME setup and controls are working great.
- Cleaned coin mechs but need some more work.
- Coin door straightend and resprayed, but needs more work.

Talking about MAME, I have been thinking about abandoning the computer setup with MAME and go for an original Donkey Kong board instead. Even though I have MAME set up real nice and clean now and every pixel is where it should be, the idea of putting a real board in there with a rich history makes me more happy everytime I think about it :) So i need to buy me a DK board, a Nintendo>JAMMA adapter (Mikesarcade's adapter houses a color inverter and audio amp which I will both need) and a cheap little supergun or build something myself for connecting it to the scart TV and controls. This thing is coming together nicely!


Really amazed by how good the "first" coat of blue looks! Tomorrow another and probably final layer.


Sanded and cleaned. Just before I put the first coat of blue on.
To get it perfectly smooth, two coats of primer and three layers of bondo were applied in total.


Fit's nicely!

New coin door cut-out drawn on the cabinet. Ready for the jigsaw! As you can see here, just a little more bondo is needed to make it perfect.


New coat of primer and some more sanding.


Sanded and primed.


Piece glued in and applied first layer of bondo.


Cut out a piece of MDF big enough to fit in the old coin door hole. New original DK coin door is wider, but shorter. So had to redo the cut-out.


Straightend and resprayed coin door in front of the cabinet before cutting the new door opening.
Door is going to be redone. Too many bumps and dents for my liking. A lot of bondoing and sanding the coming days :)


Face plates cleaned up really well! Although as expected, they're scratched up pretty bad. What to do now... My options:
- Sand and respray with aluminium-look spraypaint,
- Sand and anodize the aluminium back to original look.
- Let it be like this. Scratched up, but it shows it's history :)


Coin mech face plates. Tried paint remover on them because I would like to see how the faceplates looked like underneath the thick ugly paint. If I'd sanded it right away I would have a lot of scratches from sanding on them before even deciding wether to paint them or just clean them.


Coin mech faceplate before cleaning. Missing the coin reject thing, that's a pitty :( Luckily Mikesarcade has them.


Philips scart TV mounted on a square piece of MDF, exactly the width of the cabinet. So it is easily rotatable!


Pixel perfect Donkey Kong image, thanks to a scart TV, Ultimarc's Arcade VGA and MAME. Hooked up with home-made VGA>scart cable. Image looks exactly the same as an original DK board would look like on an arcade monitor.


Proud owner of an original DK joystick :) Been in the hands of so many gamers before me. Perhaps some good or well known players. Disassembled completely, cleaned very well with q-tips and WD40. Applied new grease. Ready for another 25 years of gaming! :)


Underside of control panel. Everything hooked up and working now. Only need swapping of the Sanwa JLF joystick with an original Nintendo joystick.


Monday, July 26, 2010

Yet another year has passed...

Determined to finally finish this project in the coming weeks. No time to post a detailed read-through on here just yet, but see some progress on my Flickr page here.

Thank you for your interest!

Tuesday, August 11, 2009

Insert coin!


Finally found an original Nintendo coin door! Just made the payment, hasn't shipped yet. It was on KLOV forum from a USA member. As expected it is not in the best cosmetic state ever, but I am looking forward to restoring it (sanding and repainting). The door came from a trashed DK3 cabinet.


When done sanding, painting and cleaning coin mechs it should look like this:


** NOTE! This is not my cabinet. It is an original that's restored by Neilyboy. See his inspiring thread over at BYOAC ArcadeControls.com.

Sunday, August 9, 2009

Final stretch. Applying all artwork and stickers.


This scratch build is entering its final stage.

Yesterday i spraypainted the three metal bars. The ones that hold the marquee and the bezel.
Today i mounted them and installed all the artwork and stickers.

Only things left to do:
- Install computer running AdvanceMAME (i think)
- Building new backdoor since the previous one is a little off. (not up to my current standard :) )
- Hoping to score a original Nintendo coin door and install that.

Short list! :)
Almost there. It took me one and a half year (with pauses) but now it's finally coming together.

Tuesday, July 28, 2009

Paint it blue!


Finally painted the cabinet blue. Paint is not color-matched with an original DK baby-blue cabinet like I wanted, but this color looks great none the less! :) It a premade color called "Azure blue" from Flexa.

Originally I was planning to use one of the paint color-codes people used who refurbished their original DK cabinets and have their paint color-matched. But since those paint-codes are (almost) all for American paintbrands and USA shops, they are of no use to me I reckon. So after searching for the right color for a long time I happen to stumbled upon a can of Azure Blue.

Just one more coat of blue because I had some dirt on my roller the last layer. And a final layer of black to touch up some spots and make it overall nicer an smoother.